Managing Plugins
The Plugins Marketplace can be accessed by clicking the "Plugins" tab in the main menu.
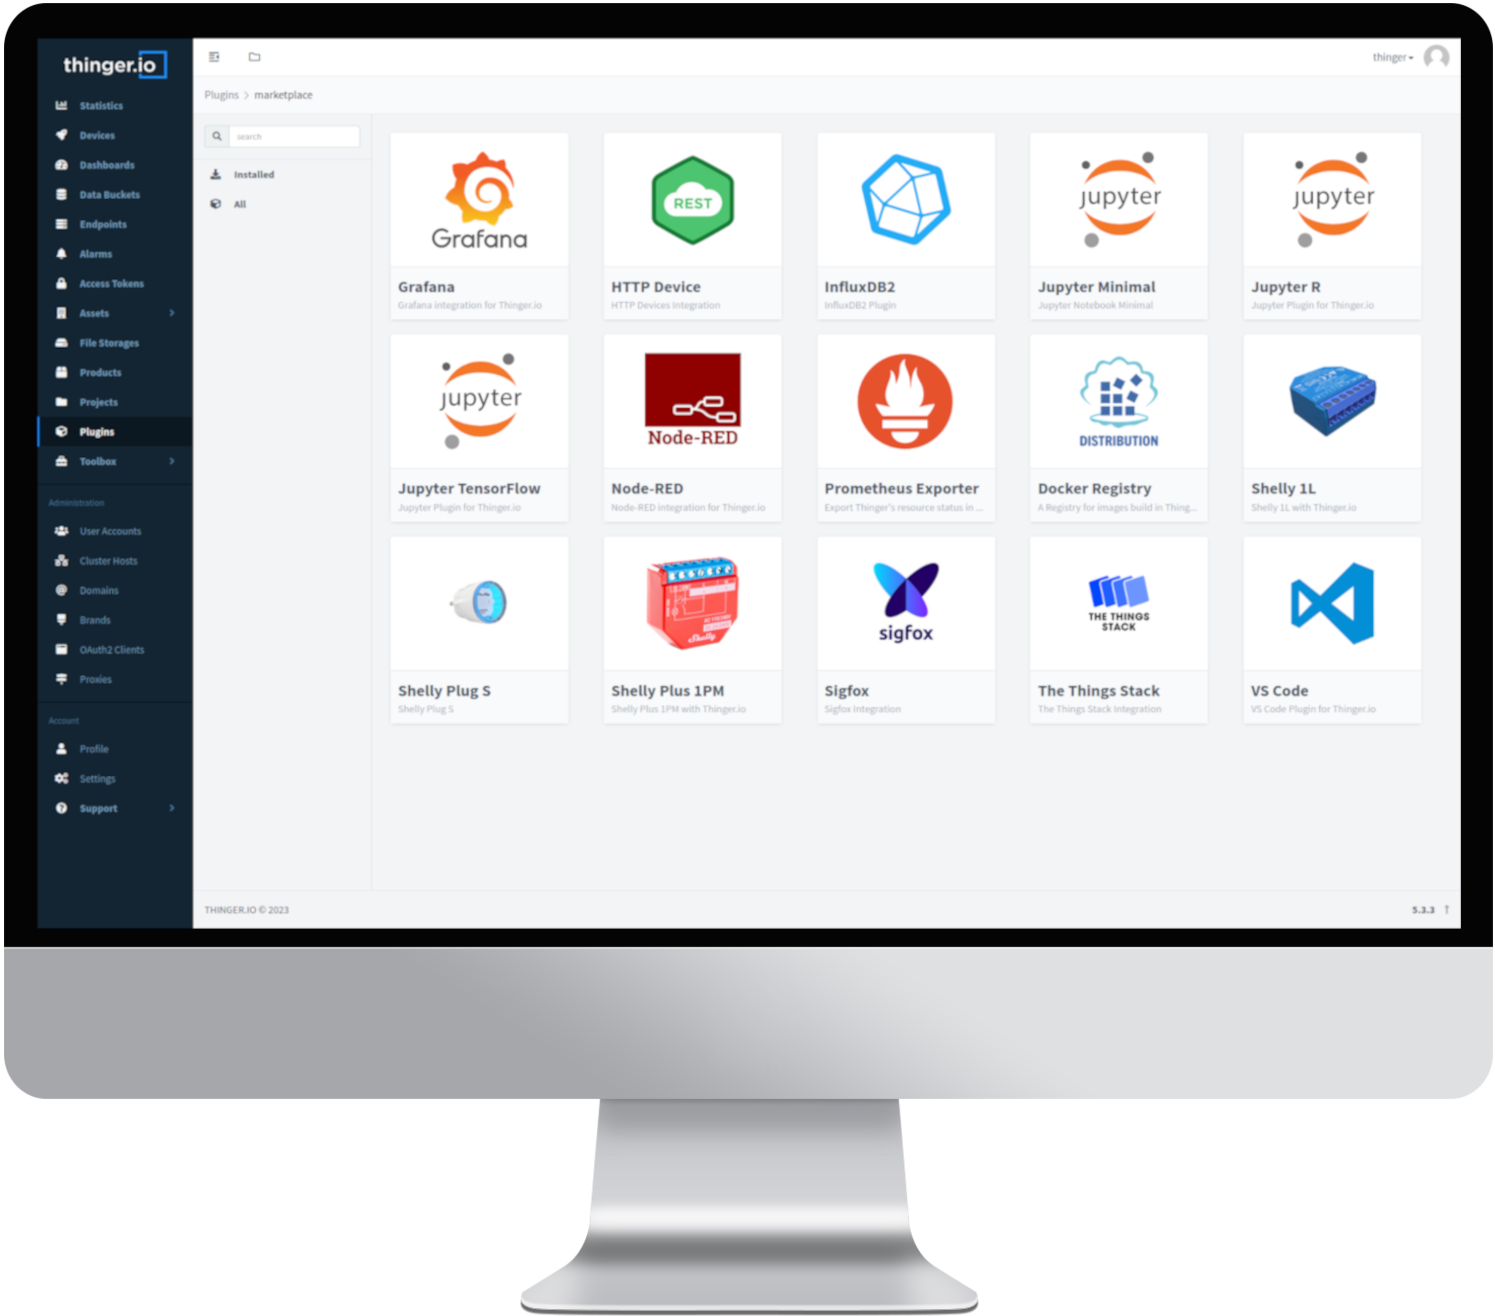
This interface displays the existing plugins that can be installed to extend the Thinger.io IoT Platform. The collection of plugins is continuously growing, offering various categories for easy filtering and management.
Install and Deploy an Existent Plugin
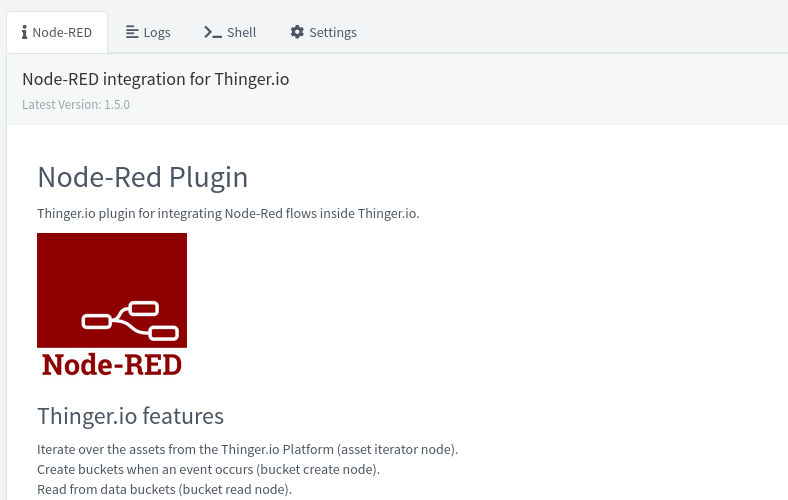
Each plugin has a detailed description page that provides useful information about its features and usage. Additionally, users can access the plugin's Logs, Shell, and even Share it publicly.
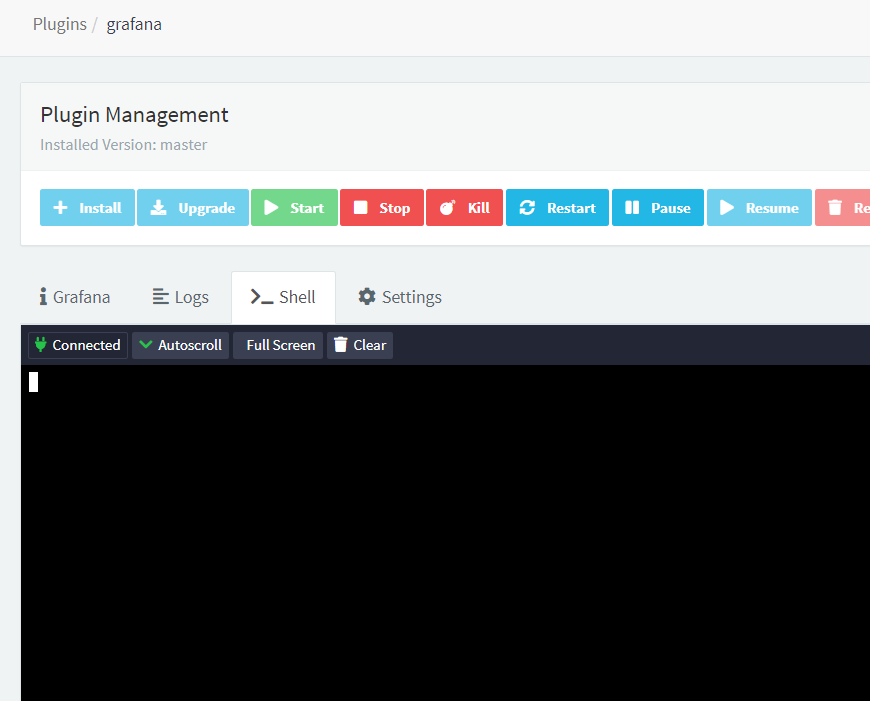
Users can easily manage plugins through the "Plugin Management" section. From here, they have the flexibility to perform various actions, such as installing, starting, stopping, killing, restarting, pausing, resuming, or removing a plugin.

This graphical interface enables the following operations:
- Install: Installs the plugin, granting access to its services and features while adding a new tab in the main menu.
- Start: Deploys the execution of the plugin process. Press this button after installation or after stopping the process to restart the execution.
- Stop: Ends the execution of the plugin process gracefully.
- Kill: Forcefully terminates the plugin process.
- Restart: Performs a Stop + Start cycle for the plugin process.
- Pause: Halts the execution of the plugin while preserving all runtime variables.
- Resume: Resumes the plugin's execution after being paused.
- Remove: Uninstalls the plugin from the platform.
Analyzing the Logs
Accessing and monitoring your plugin logs at Thinger.io is a breeze. Follow these simple steps to gain valuable insights into your plugin's activities:
-
Select Your Plugin: Once you are logged into your Thinger.io account, navigate to the Plugins section and locate the plugin you wish to analyze. Click on the plugin's name or icon to access its detailed view.
-
Click on the Logs Tab: Within the plugin's detailed view, you'll find a tab labeled Logs. Click on this tab to access the logs section.
-
Connect to Logs: Upon entering the Logs tab, you'll notice a Connect button. Simply click this button to establish a connection to your plugin's logs.
-
Monitor in Real-time: With the connection established, you now have real-time access to your plugin's logs. You'll be able to see a continuous stream of activities, events, and data generated by the plugin as it interacts with devices and the IoT ecosystem.
-
Analyze and Troubleshoot: As the logs populate, carefully analyze the information presented. Look for any potential errors or anomalies that may require attention. The logs will offer valuable clues to the plugin's performance and reveal any issues that need to be addressed promptly.
By following these steps, you can effortlessly access and leverage the power of your plugin's logs.
Accessing the Shell
The Shell feature, gives you full control over your plugin's configuration and allowes you to add packages or extensions effortlessly. With the Shell, you can execute instructions and commands directly, streamlining the process of customizing and fine-tuning your IoT solutions.
To access the Shell and unleash its potential, follow these simple steps:
-
Locate Your Plugin: After logging into your Thinger.io account, navigate to the Plugins section and find the specific plugin you wish to configure or extend. Click on the plugin's name or icon to access its detailed view.
-
Go to the Shell Tab: Within the plugin's detailed view, look for the Shell tab. Click on this tab to access the Shell feature.
-
Connect to the Shell: Once you are in the Shell tab, you'll find a Connect button. Click this button to establish a connection to the plugin's Shell.
-
Execute Instructions: With the connection established, you now have direct access to the plugin's Shell. Here, you can execute instructions, change configurations, and add packages or extensions with ease. Simply input the desired commands and watch the changes take effect.
The Shell feature grants you complete control over your plugin, allowing you to make real-time adjustments and tailor it to your specific needs. Whether you're tweaking configurations or adding new functionality, the Shell ensures a seamless and efficient experience.
Rest assured that our Shell feature is designed with security in mind. We implement robust safeguards to prevent unauthorized access and ensure the integrity of your IoT ecosystem.
Public access
Thinger.io offers a convenient way to grant public access to your plugins, allowing a broader audience to benefit from your innovative solutions. However, it's essential to ensure the security of your plugin and data. To enable public access safely, follow these steps:
-
Access the Settings Tab: After logging into your Thinger.io account and selecting the plugin you want to make public, navigate to the plugin's detailed view. Look for the Settings tab and click on it to access the configuration options.
-
Enable Public Access: Within the Settings tab, you'll find an option to enable public access. Toggle this option to provide access to your plugin to a wider audience.
-
Verify Plugin Authentication: Before proceeding, it is crucial to ensure that your plugin is capable of handling authentication independently. Public access means that anyone can interact with your plugin, so it must have robust authentication mechanisms in place to safeguard data and maintain control over who can access the plugin's functionalities.
-
Secure Your Plugin: Review your plugin's authentication process thoroughly and make any necessary adjustments to guarantee that unauthorized users cannot gain access. A robust authentication mechanism ensures that only legitimate users can utilize the plugin's features.
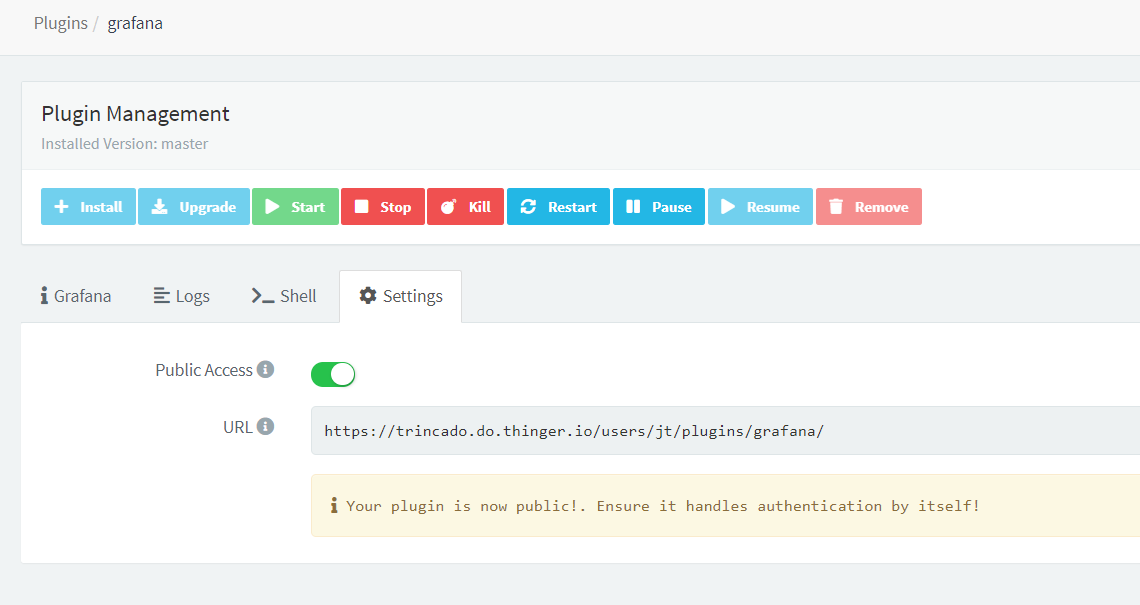
By following these steps, you can safely enable public access to your plugin and expand its reach to a broader audience. Public access opens up new opportunities for collaboration, feedback, and exposure, but ensuring the plugin's security and authentication measures is paramount. At Thinger.io Marketplace, we prioritize data protection and user privacy, making it easier for you to share your IoT solutions while maintaining control and security.