Comet Tx6xx and Tx5xx Series
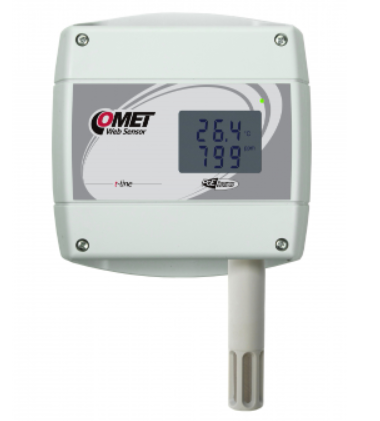
A Thinger.io plugin that seamlessly ingests SOAP XML data coming from Comet Tx5xx / Tx6xx dataloggers (temperature, humidity, CO₂ and/or pressure) and converts it into structured JSON records stored in a Data Bucket. The plugin provides an HTTPS endpoint, automatic device provisioning, data parsing in Node JS, and ready-to-use dashboards and alarms.
Thinger.io and Plugin Name Integration
Integrating Comet dataloggers with Thinger.io turns raw sensor frames into actionable IoT data:
-
Zero‑touch onboarding – every new logger becomes a Thinger Device the first time it reports.
-
Unified data model – the Node JS parser normalises both CO₂‑capable and Pressure‑only frames, distinguishing between firmware v1.0 & v1.1 XML versions.
-
Dashboards & Tools out‑of‑the‑box – visualise temperature, humidity, CO₂, pressure and alarm LEDs.
-
Fully serverless inside Thinger.io – no extra VPS or middleware required; everything runs in the Node‑RED and File Storage plugins shipped with the platform.
Requirements
| Component | Minimum version | Notes |
|---|---|---|
| Thinger.io instance | 6.5.4-developer or newer | Must support Plugins and Proxy Forwarders |
| Node-RED plugin | latest | Enabled in Thinger.io and reachable internally on port 1880 |
node-red-contrib-http-custom-port | latest | Allows HTTP listeners on custom ports (4444 by default) |
| Comet Tx5xx / Tx6xx logger | any SOAP-capable firmware | Device must be configured to POST data to http://your-host:4444/ |
| External TCP/UDP reachability | Port 4444 (or chosen) | Forwarded to Node-RED via Thinger Proxy Forwarder |
Get Started
Installation
- Create a Proxy Forwarder — In Plugins → Proxy Forwarders add a rule:
- External Port:
4444 - Internal Port:
4444 - Target Plugin:
Node-RED - Enable Node-RED — If not already running, start the Node-RED plugin.
- Install extra palette — Inside Node-RED click Hamburger → Manage Palette → Install and add
node-red-contrib-http-custom-port. - Import the flow — Create a new workspace, click Import, paste the following Data Forwarder JSON:
[
  {
    "id": "14cbd731707c799d",
    "type": "tab",
    "label": "Data Forwarder",
    "disabled": false,
    "info": "",
    "env": []
  },
  {
    "id": "07593d6ab65d04d0",
    "type": "function",
    "z": "14cbd731707c799d",
    "name": "URL getter",
    "func": "let xml = (msg.payload || \"\").toString('utf8').trim();\n\nlet user = env.get(\"THINGER_USER\");\nlet host = env.get(\"THINGER_HOST\");\n\n// In case the Product or Resource Name were to be\n// modified, the following URL would have to be updated\n// accordingly\nlet url = \"https://\" + host + \"/v1/users/\" + user + \"/products/comet_tx5xx_tx6xx/resources/comet_data_resource\"\n\nmsg.payload = xml;\nmsg.url = url;\n\nreturn msg;\n",
    "outputs": 1,
    "timeout": 0,
    "noerr": 0,
    "initialize": "",
    "finalize": "",
    "libs": [],
    "x": 610,
    "y": 160,
    "wires": [["9b19493f4a133187", "f1770c1b8556b09b"]]
  },
  {
    "id": "f1770c1b8556b09b",
    "type": "http response",
    "z": "14cbd731707c799d",
    "name": "OK",
    "statusCode": "200",
    "headers": {},
    "x": 770,
    "y": 200,
    "wires": []
  },
  {
    "id": "c8355bc6f75b8ff6",
    "type": "node-red-contrib-http-custom-port",
    "z": "14cbd731707c799d",
    "name": "HTTP request",
    "url": "/",
    "method": "post",
    "upload": false,
    "swaggerDoc": "",
    "port": "4444",
    "x": 430,
    "y": 160,
    "wires": [["07593d6ab65d04d0"]]
  },
  {
    "id": "9b19493f4a133187",
    "type": "http request",
    "z": "14cbd731707c799d",
    "name": "",
    "method": "POST",
    "ret": "txt",
    "paytoqs": "ignore",
    "url": "",
    "tls": "",
    "persist": false,
    "proxy": "",
    "insecureHTTPParser": false,
    "authType": "bearer",
    "senderr": false,
    "headers": [
      {
        "keyType": "other",
        "keyValue": "application",
        "valueType": "other",
        "valueValue": "xml"
      }
    ],
    "x": 790,
    "y": 120,
    "wires": [[]]
  }
]
- Finally, enter the node "http-request", select "Use authentication", select "Bearer authentication" and paste
${THINGER_TOKEN_NODE_RED_PLUGIN}in Token. Then press "Done" - Press "Deploy" to start Node RED instance.
Usage
- Configure each Comet logger's SOAP destination to
https://<your-host>/4444/. - Node-RED receives the POST request, forwards raw XML to the Product API.
- The Node JS script parses and normalises the frame; Thinger auto-provisions (device-id =
comet_<passKey>by default) and writes data to the bucket. - Build dashboards or set alarms in the usual Thinger UI.