Teltonika Telematics

The Teltonika Telematics Plugin for Thinger.io enables the integration of Teltonika's GPS tracking devices with the Thinger.io Platform. This plugin facilitates real-time monitoring, data visualization, and management of your Teltonika devices within the Thinger.io ecosystem.
Thinger.io and Teltonika Telematics Integration
Integrating Teltonika Telematics devices with Thinger.io offers a robust solution for fleet management, asset tracking, and remote monitoring. Key features include:
- Real-Time Data Monitoring: Access live data from your Teltonika devices, including location, speed, and sensor information.
- Custom Dashboards: Visualize device data through customizable dashboards, enabling quick insights and informed decision-making.
- Geofencing Capabilities: Set up geofences to receive alerts when devices enter or exit predefined areas.
- Historical Data Analysis: Store and analyze historical data to identify patterns and optimize operations.
- Automated Alerts: Configure notifications for specific events, such as excessive speed or unauthorized movement.
Potential use cases encompass:
- Fleet Management: Monitor vehicle locations, routes, and statuses to enhance efficiency and reduce operational costs.
- Asset Tracking: Keep track of valuable assets in transit to prevent loss and ensure timely deliveries.
- Remote Equipment Monitoring: Oversee machinery and equipment in remote locations to detect issues promptly and schedule maintenance.
Get Started
Installation
First install this plugin through the Plugin Management Interface. More information here.
Afterwards create some generic certificates with the following commands, configuring it with your own details and setting your thinger user in the Common Name field (see image for example):
openssl req -x509 -newkey rsa:4096 -keyout private.pem.key -out cert.pem.crt -sha256 -days 9125 -nodes

Configuration
The configuration of this devices require both creation of resources in the Thinger.io Platform and configuring the Teltonika Device.
Teltonika Configurator
The teltonika device needs to be configured with its own Teltonika Configurator Software Management Tool.
Once the device is connected, the following changes need to be done:
- In the
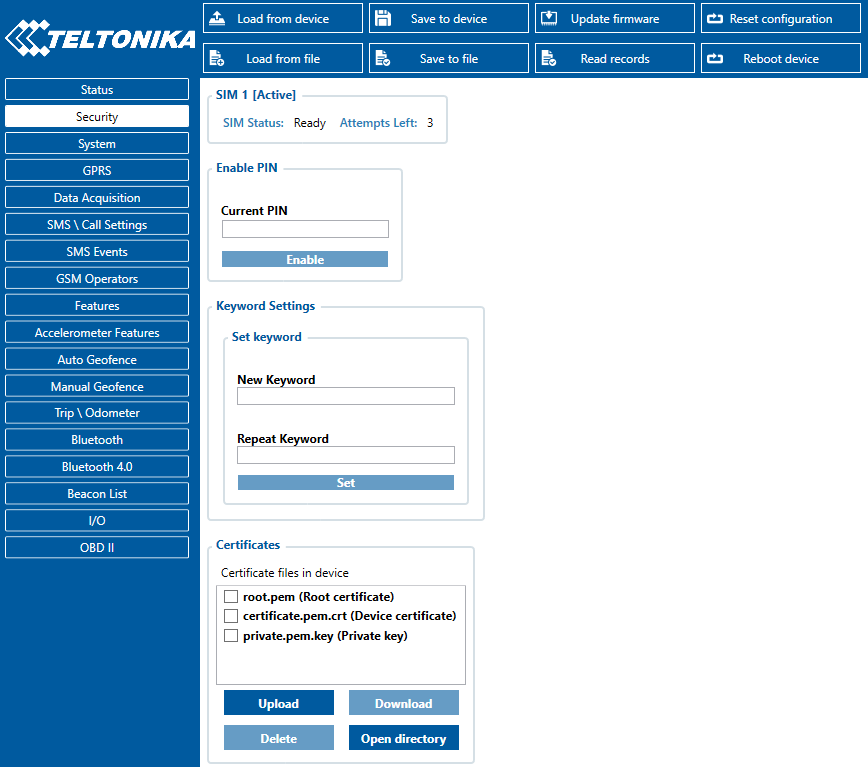
Security Tab, upload the device certificates.
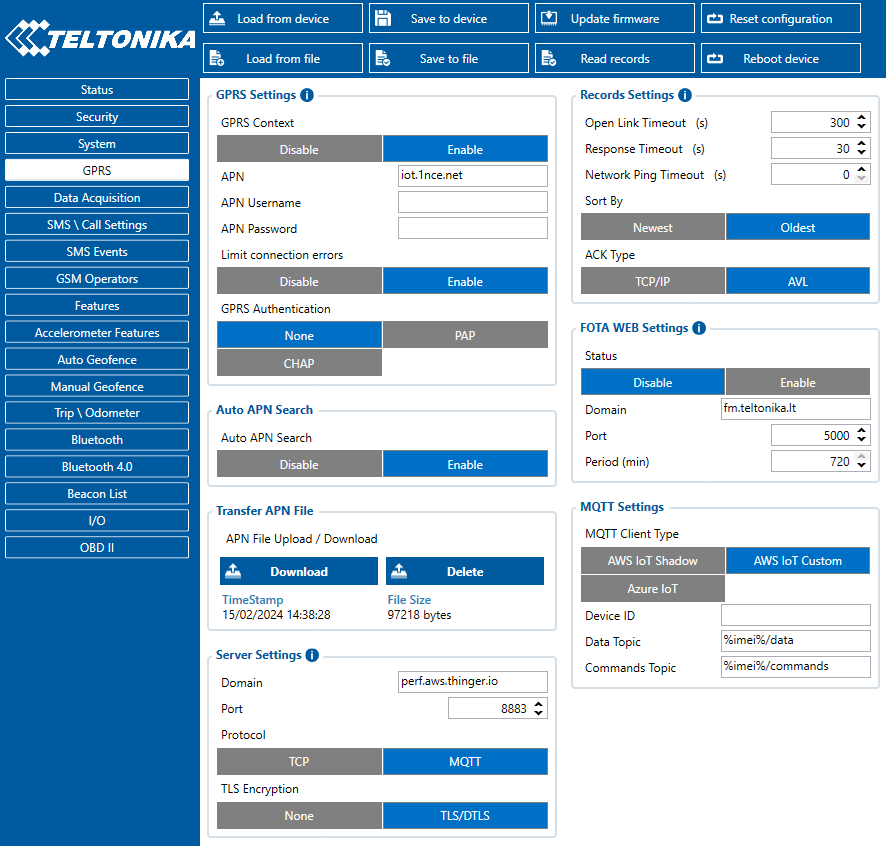
- In the
GPRS Tab, set the Server Settings box with your Thinger.io instance domain, the Port8883, ProtocolMQTTand TLS EncryptionTLS/DTLS. Then in the MQTT Settings box, selectAWS IoT Customand leave the default settings as shown in the image.
After that, copy the device IMEI from the status page, as it will be the device Id in Thinger.io.
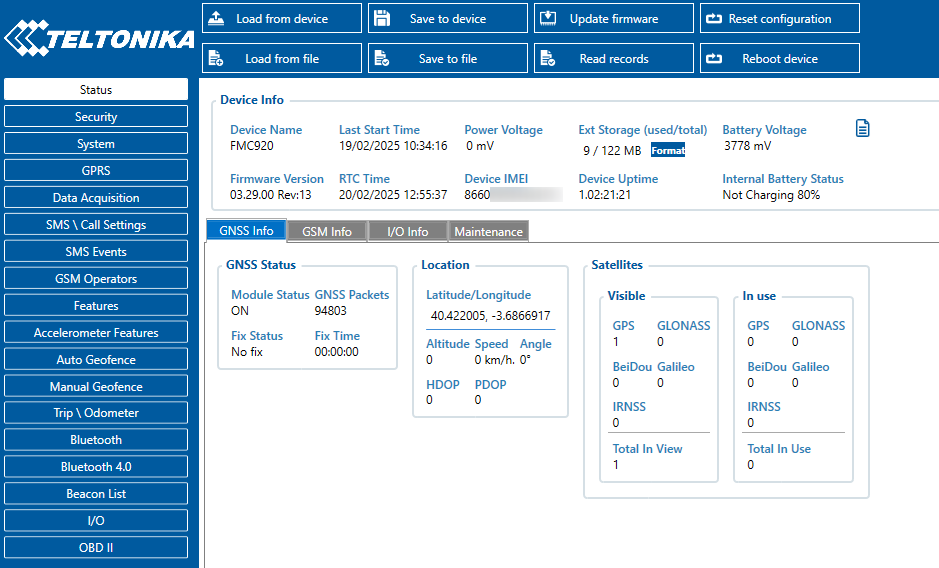
After the configuration is done, make sure to reboot the device.
Thinger.io Platform
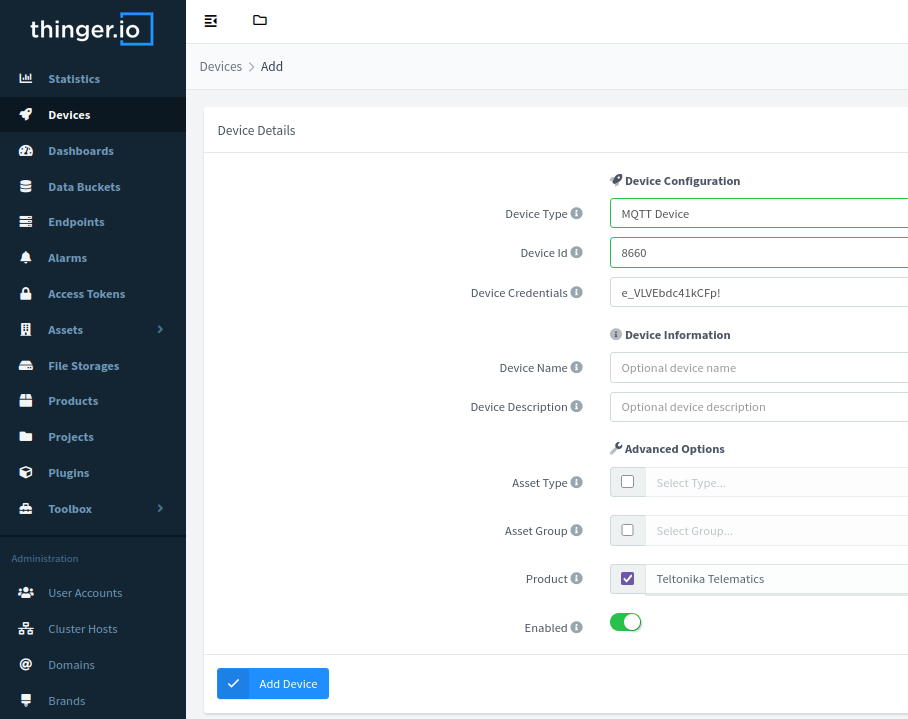
Create a new device through the Devices menu, of type HTTP, the Id the IMEI of the device and assign it to the product Teltonika Telematics. At this point assign it random credentials, they will not be used in favor of the certificates.
Usage
This plugin will autoprovision its required buckets and save the data in Teltonika Telematics Data and in case it receives beacon data in Teltonika Telematics Beacon.
When a bluetooth beacon of a Teltonika Eye Beacon is uploaded from the device, and endpoint in Thinger.io will be called. If the product corresponding to this Teltonika Eye Beacon is installed, this Eye Beacon will autoprovision itself in the platform. This endpoint will be disabled by default, and will need to be enabled if the Teltonika Eye Plugin is installed.
The decoder is found in a File Storage in Thinger.io of name Teltonika Decoder. Any differences in the preconfigured AVL list can be changed or added in the file devices/fmbxxx.js installed Teltonika Decoder storage.
Additional Resources
Checkout these resources to further understand how the data is decoded, as well as any other required configuration.